One of my favorite Bridal Portrait sessions this year was with this beautiful and exhuberant young bride-to-be!!!
Brooke & Chadwick were getting married at Middleton Place Inn. Part of the provisions for getting married there, includes free access to Middleton Plantation for a Bridal Shoot. So a month before the big day, after the final fitting on her dress, Brooke and two of her “bestie” bridesmaids met with me to photogaph her Bridal Portraits.
Bridal Sessions are typically done about a month in advance. This works out great for several reasons. The final fitting for the gown is usually around this time, if the gown gets dirty there’s time to have it taken care of during the final cleaning, and it allows time for the bride to order her favorite enlargements to display at the reception or put in her Photo Guest Book.
For most Bridal Sessions, I bring my Nikon D4 or D810, Nikkor 70-200 VRII, and SB-910 (with RadioPopper Px wireless transmitter attached), all mounted on a Manfrotto Carbon Fiber tripod. This gets carried over one shoulder. I also bring a single Manfrotto 9-ft light stand, usually with a modified 24″ Lastolite EZYBox on top, a Boabags 10lb weight on the bottom, and a Manfrotto Justin Clamp attached along the pole somewhere. The EXYBox speedring has been modified to hold two flashes instead of one. I mount 2 SB-800 flashes (with RadioPopper Px receivers attached) into the softbox. Both are on Group A, acting as one unit. Why mount two? More power and better light dispersion. Attached to the Justin Clamp is a third SB-800, set to Group B. This rig gets carried on my other shoulder and balances out quite nicely making me mobile and self-sufficient.
When I get to a scene I want to shoot in, I set my camera where I want to frame the image. If there’s beautiful natural light, I use it! But if I feel additional front or side lighting is needed, I’ll add the Group A main light. If I feal some sort of “accent” light would ehnance the scnee, I’ll hide the Group B flash either directly behind her or over bride’s shoulder (out of frame). Sometimes a little rim or kicker light can make ALL the difference. The three remote flashes are controlled by my SB-910 Master flash, manually dialing in the power settings that I want.
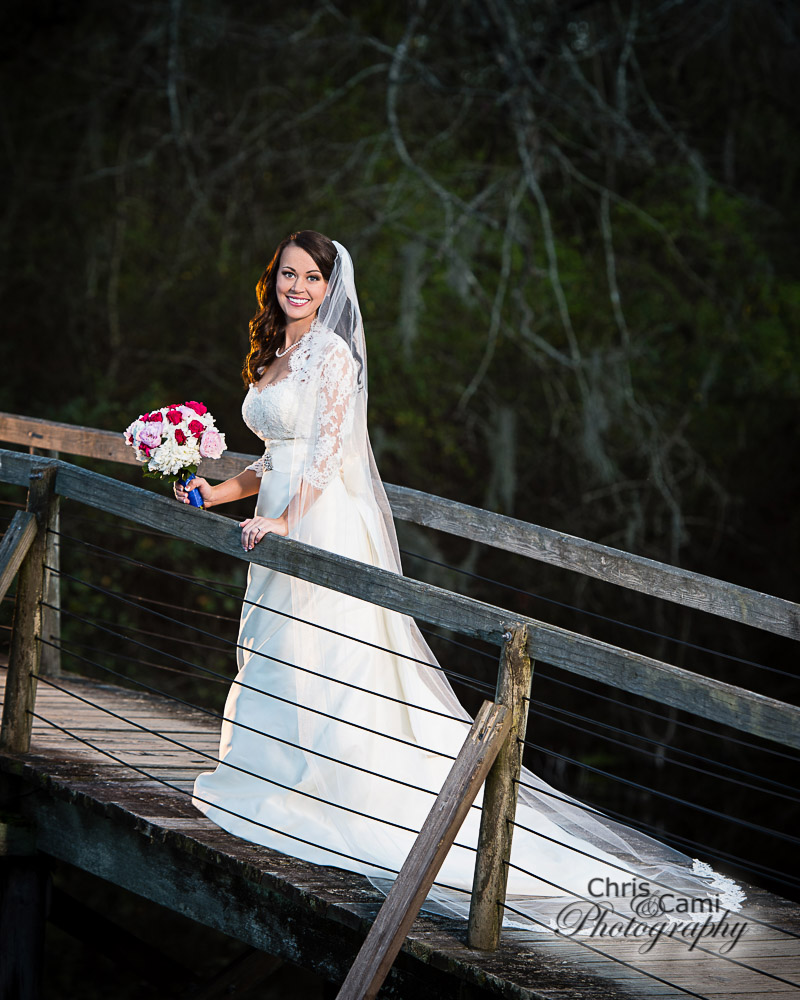
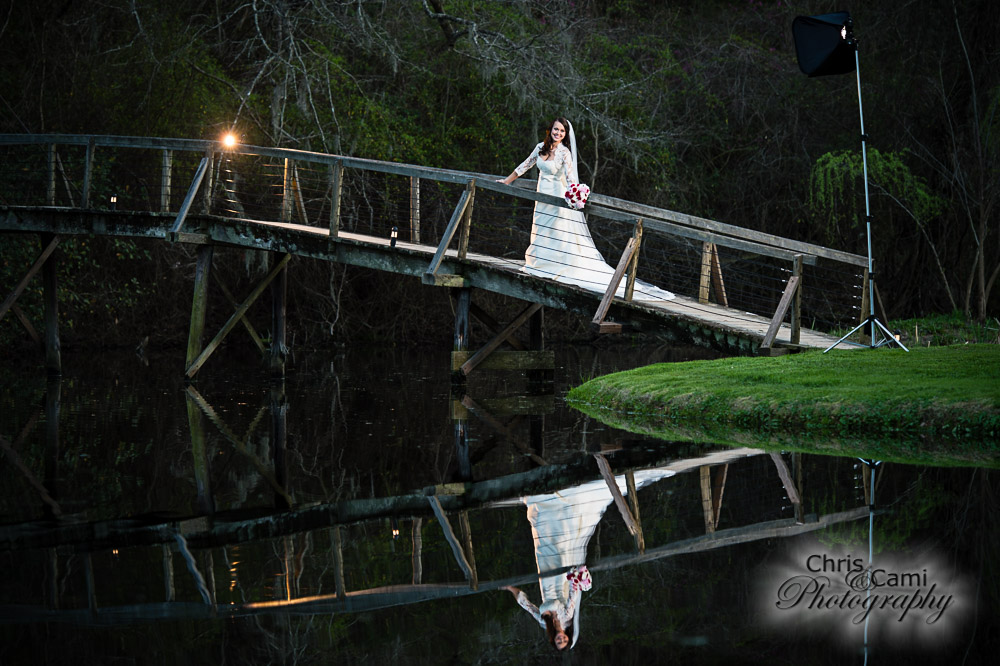
Here’s the final image of one of the setups at Brook’s session. The wide shot below shows a behind-the-scenes view of the lighting setup I used to get it. The main light to her right creates a beautiful, directional main light. The rim light to her right provides extra pop on her hair and helps separate her from the background. Using the additional lighting allows me to slightly underexpose the background, while getting perfect exposure on her so that she stands out in the scene. Photographing this scene with natural light only, at this late dusk hour, would have produced a “muddy” image with muted colors and very little contrast.
Many photographers these days only use “natural light”. But all the extra effort, and gorgeous off-camera lighting, helped accentuate Brooke’s features and make this already beautiful young lady look her absolute best! It’s why we continue to go the extra mile for our clients. And it’s why Brooke LOVED the scene so much that this image ended up as one of her favorites, displayed as a 20×30 Canvas Portrait at the entrance to her reception for all her guests to enjoy!